Treehouse 2012

Show off your cool vehicle designs and track burning speedsters!
Post Reply
mebetree
Pine Head
Pine Head
Posts: 60
Joined: Wed Jan 11, 2012 11:26 am
Location: Holtsville, NY

Treehouse 2012

Post by mebetree »

First my wolf

Image

Image

Image
mebetree
Pine Head
Pine Head
Posts: 60
Joined: Wed Jan 11, 2012 11:26 am
Location: Holtsville, NY

Re: Treehouse 2012

Post by mebetree »

Then my Webelos

Image

Image

Image
mebetree
Pine Head
Pine Head
Posts: 60
Joined: Wed Jan 11, 2012 11:26 am
Location: Holtsville, NY

Re: Treehouse 2012

Post by mebetree »

And lastly my daughter who doesn't race but insists on building her own car

Image

Image
mebetree
Pine Head
Pine Head
Posts: 60
Joined: Wed Jan 11, 2012 11:26 am
Location: Holtsville, NY

Re: Treehouse 2012

Post by mebetree »

While I'm at it, the cars from 2011. A reindeer, penguin and a chinchilla.

Image
User avatar
whodathunkit
Pine Head Legend
Pine Head Legend
Posts: 2477
Joined: Sat Apr 25, 2009 5:56 pm
Location: Forgan, OK

Re: Treehouse 2012

Post by whodathunkit »

mebetree wrote:While I'm at it, the cars from 2011. A reindeer, penguin and a chinchilla.

Image
(Where is oddzilla?) Would you look at that Penguin car!

Wow mebetree, nice job on these cars & the stands.
8) 8) 8) 8)
What type of automobile can be spelled the same forwards & backwards?
Oddzilla
Pine Head
Pine Head
Posts: 91
Joined: Tue Jun 16, 2009 7:58 am
Location: Shelby Township, MI

Re: Treehouse 2012

Post by Oddzilla »

Those are sweet! Awesome job on those!

:D

I showed my son, who is a penguin fanatic and he loved it. HE said he wants to do one like that for next years derby.

:D :D
User avatar
whodathunkit
Pine Head Legend
Pine Head Legend
Posts: 2477
Joined: Sat Apr 25, 2009 5:56 pm
Location: Forgan, OK

Re: Treehouse 2012

Post by whodathunkit »

:agree: ;) 8) SUN GLASSES :thumbup:
Oddzilla wrote:Those are sweet! Awesome job on those!

:D

I showed my son, who is a penguin fanatic and he loved it. HE said he wants to do one like that for next years derby.

:D :D
Good luck to you guys!

Whodathunkit.
What type of automobile can be spelled the same forwards & backwards?
User avatar
ciodude
Master Pine Head
Master Pine Head
Posts: 283
Joined: Wed Apr 04, 2007 1:34 pm
Location: Charleston, WV

Re: Treehouse 2012

Post by ciodude »

All very creative! I see your kids think like mine do! I am impressed with all the little cut outs for the dinosaur skeletons. Did you have any special tips for that, or just drill and disengage and engage the scroll saw blade every time?
mebetree
Pine Head
Pine Head
Posts: 60
Joined: Wed Jan 11, 2012 11:26 am
Location: Holtsville, NY

Re: Treehouse 2012

Post by mebetree »

ciodude wrote:All very creative! I see your kids think like mine do! I am impressed with all the little cut outs for the dinosaur skeletons. Did you have any special tips for that, or just drill and disengage and engage the scroll saw blade every time?
Simplier than that. I just took the drill press and kept making holes next to each other over and over again. Then I threw a rotozip bit into the drill press and slid the wood across to cut out the spaces between the holes. We did use a coping saw a little bit to cut the sharper edges.
User avatar
ciodude
Master Pine Head
Master Pine Head
Posts: 283
Joined: Wed Apr 04, 2007 1:34 pm
Location: Charleston, WV

Re: Treehouse 2012

Post by ciodude »

mebetree wrote:Simplier than that. I just took the drill press and kept making holes next to each other over and over again. Then I threw a rotozip bit into the drill press and slid the wood across to cut out the spaces between the holes. We did use a coping saw a little bit to cut the sharper edges.
Thanks for sharing. I am not sure I would have thought of that.
User avatar
drathbun
Master Pine Head
Master Pine Head
Posts: 195
Joined: Tue Jan 17, 2012 1:50 pm
Location: Carrollton, Texas

Re: Treehouse 2012

Post by drathbun »

I love the stand. We're working on an achievement for our Bear badge where you have to make a display stand for a model you have built, and your design looks much more functional (and easier to build) than what I had come up with! Thanks for sharing the pictures.
mebetree
Pine Head
Pine Head
Posts: 60
Joined: Wed Jan 11, 2012 11:26 am
Location: Holtsville, NY

Re: Treehouse 2012

Post by mebetree »

These are the instructions I came up with to give to the other den leaders who liked it too.

Parts needed per stand (last number is how long a piece of wood). I personally use pine because it is cheap and drills and nails easily since it is a softer wood.

1” x 4” x 14”
2” x 3” x 4”
¼” x ¼” x 10 ¼”
4 Wood Screws (#6 – 1 ½”)
4 Nails (3/4” long, very skinny, not sure what official size is)
1/8” drill bit
Wood Glue

Directions

1) Cut the 1”x4” piece of wood in half so that you have two 1”x4”x7” pieces of wood. If you would rather pre-cut the wood than have the scout do it, that’s fine.
2) Compound miter cut one end of the 2”x3” at a 10 degree angle in each direction so that it slopes down from one corner to the opposite corner.
3) Cut the ¼” x ¼” piece at the 7” mark at a 45 degree angle back towards the long side. This will leave you with the two pieces needed to prevent the car from sliding off. This is an easy cut for the scouts to make if you want to have them do it.
4) Sand all the pieces of wood to smooth the edges.
5) Pre-drill two holes in the center of both 1”x4”x7” about 3” from each end (which will leave the two holes about an inch apart). I also taper the hole but if you don’t want to you don’t have to.
6) Set one piece of 1”x4” on the side of the 2”x3” that is miter cut to confirm which side of the 1”x4” is lower. Mark the corner of the 1”x4” that is lowest.
7) Put a few dabs of wood glue on the ¼” x ¼” x 7” piece of wood and nail it to the long side of the 1”x4” from step 6 with the mitered end being in the corner you marked in step 6.
8) Put a few dabs of wood glue on the ¼” x ¼” x 3 ½” piece of wood and nail it to the short side of the 1”x4” from step 6 with the mitered end being in the corner you marked in step 6.
9) Put a few dabs of wood glue on the straight cut end of the 2”x3” and screw the second 1”x4” (the one without the square dowels) into it.
10) Put a few dabs of wood glue on the mitered end of the 2”x3” and screw the first 1”x4” (the one with the square dowels) into it. Make sure that the square dowels are meeting in the low corner.
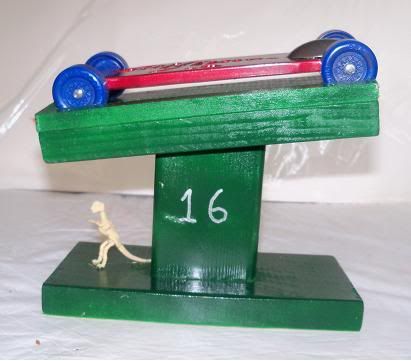
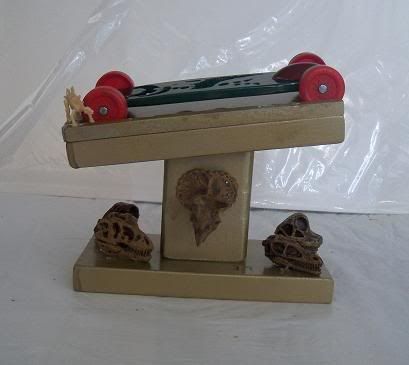
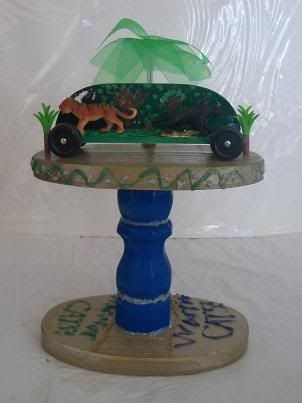
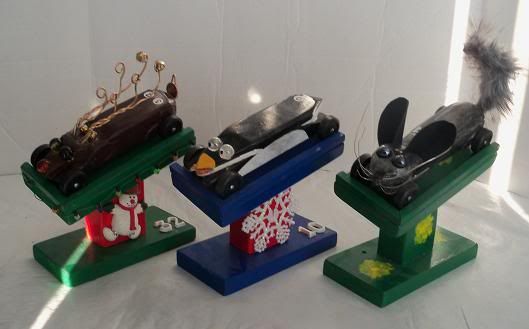
11) Paint, stain or otherwise decorate.
Post Reply