weight, anyone doing the new placement ?
-
gpraceman

- Site Admin

- Posts: 4926
- Joined: Fri Jun 20, 2003 12:46 am
- Location: Highlands Ranch, CO
- Contact:
Re: weight, anyone doing the new placement ?
I see an article idea for MaxV's newsletter. He does a good job of testing things out and reporting the results.
Randy Lisano
Romans 5:8
Awana Grand Prix and Pinewood Derby racing - Where a child, an adult and a small block of wood combine for a lot of fun and memories.
Romans 5:8
Awana Grand Prix and Pinewood Derby racing - Where a child, an adult and a small block of wood combine for a lot of fun and memories.

Re: weight, anyone doing the new placement ?
I think this is a great idea, will you talk to randy ?gpraceman wrote:I see an article idea for MaxV's newsletter. He does a good job of testing things out and reporting the results.
Sporty
-
Stan Pope

- Pine Head Legend

- Posts: 6856
- Joined: Sat Jul 05, 2003 7:01 pm
- Location: Morton, Illinois
- Contact:
Re: weight, anyone doing the new placement ?
Of course, but others of us want to understand both what and why.sporty wrote:I prefer to have less of a physics type of conversation and more of pictures of the build and what the comments and thoughts are from the builders, who are doing it.
At Thu Sep 18, 2014 3:30 am I said, "Time to put it on a test track and take some measurements!sporty wrote:So Maybe Stan, can you build a couple and run it down your track ? get some pictures, maybe try some different ways .? maybe you can figure out how much faster it is ? do some testing and times.
Track is home ... just gotta make room for it in the basement! ... Easier said than done. It is already nearly full from stuff I played with 20 or 30 years ago.
Stan
"If it's not for the boys, it's for the birds!"
"If it's not for the boys, it's for the birds!"
 Re: weight, anyone doing the new placement ?


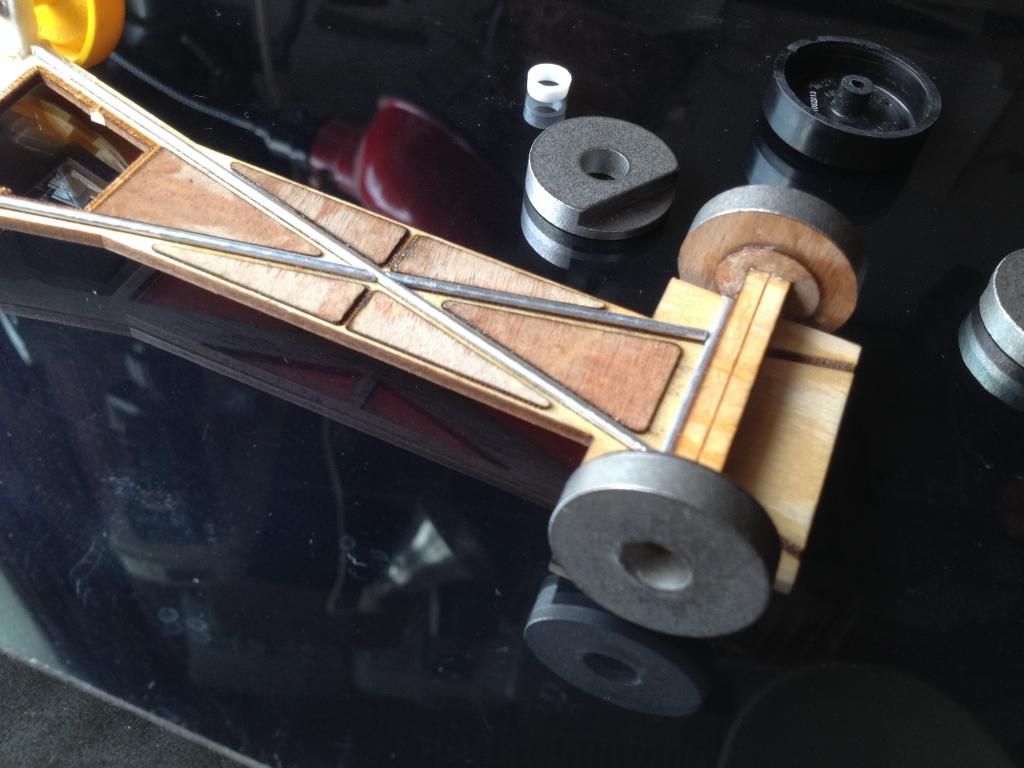
One washer sitting in there. hard to take a pic and not have it look like the washer is not center. I think this one turned out good.

I'd like to make a mold and make some lead ones.
I do think these washers might be a tad tight, just took a wheel and went to the local hardware store. 15 cents each.
a vender sells a double washer, I got a email out to them, the local store had a display of a double washer, one piece. but only the display and they don't carry them.
17/32, 1/x11/64. not sure the size will work, trying to get a sample to find out. my local store don't carry metric washers, I wanted to look at them too.
These here, as I said, might be a little too big, not sure. id have to build a car and find out.
-
Stan Pope
- Pine Head Legend
- Posts: 6856
- Joined: Sat Jul 05, 2003 7:01 pm
- Location: Morton, Illinois
- Contact:
Re: weight, anyone doing the new placement ?
Yes, Sporty, the washer OD looks a bit large. So, too, does the ID! Should be able to offset the mass loss from OD reduction with more ID reduction!
Good pix, by the way.
Those are the same size washers I tried about 25 years ago in an impromptu experiment with weighted wheels. (They ran a long time ... once they got started. )
)
I successfully turned down some large washers to form a ring for my loaded spin test set up. I first ganged 3 together, drilled and tapped 4 holes so as to hold them firmly together. Then turned to OD smooth with a groove for the weighted line, turned the ID to snug fit to wheel, and turned the faces to remove the screw ends that held the assembly together! I think that steel in washers is somewhat harder than the steel we would normally work on a lathe, but I was successful using normal HSS tooling.
It does look like casting an alternative from lead or turning one from stock steel might produce a weight with better tolerance.
On straight axles w/ cambered holes ... I haven't yet convinced myself that I can straighten BSA axles sufficiently to avoid benefit from tuning. That is another of the issues I hope to resolve when I get enough space cleared in the basement!
Off-the-shelf parts definitely attractive since many builders would not be able to alter the washers much.
Good pix, by the way.
Those are the same size washers I tried about 25 years ago in an impromptu experiment with weighted wheels. (They ran a long time ... once they got started.
I successfully turned down some large washers to form a ring for my loaded spin test set up. I first ganged 3 together, drilled and tapped 4 holes so as to hold them firmly together. Then turned to OD smooth with a groove for the weighted line, turned the ID to snug fit to wheel, and turned the faces to remove the screw ends that held the assembly together! I think that steel in washers is somewhat harder than the steel we would normally work on a lathe, but I was successful using normal HSS tooling.
It does look like casting an alternative from lead or turning one from stock steel might produce a weight with better tolerance.
On straight axles w/ cambered holes ... I haven't yet convinced myself that I can straighten BSA axles sufficiently to avoid benefit from tuning. That is another of the issues I hope to resolve when I get enough space cleared in the basement!
Off-the-shelf parts definitely attractive since many builders would not be able to alter the washers much.
Stan
"If it's not for the boys, it's for the birds!"
"If it's not for the boys, it's for the birds!"
-
FatSebastian

- Pine Head Legend
- Posts: 2818
- Joined: Wed Jun 17, 2009 2:49 pm
- Location: Boogerton, PA
Re: weight, anyone doing the new placement ?
I have never used lead tape, but I wonder if it could be wound up to the desired shape and diameter. (I also wonder if Pb might be better at dampening Sporty's micro-vibrations.)Stan Pople wrote:Off-the-shelf parts definitely attractive...
Re: weight, anyone doing the new placement ?
Okay,
Been tinkering a bit, I got one side done, test/tinker.
I find the o.d. to work just fine. I do feel ya, the I.D. is a bit big. but what I could find at the store.
I had a 3/4 of a way done car, just sitting, never finished it, just needed weight and tuning. and paint or monokote. So decided to tinker.
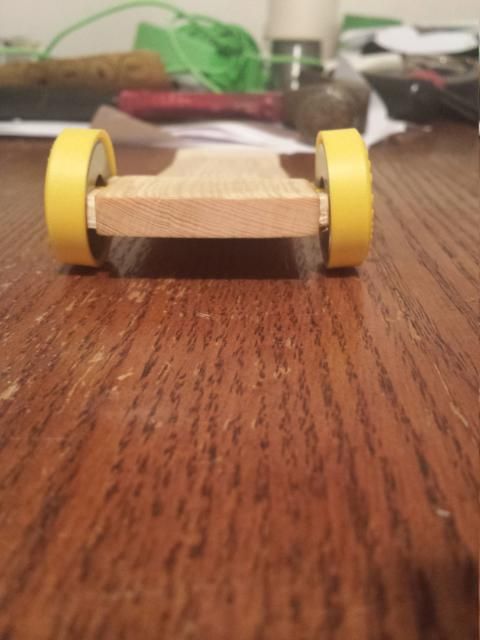
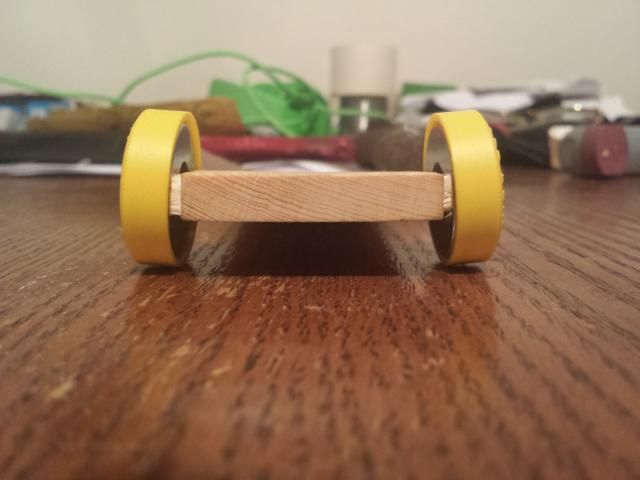
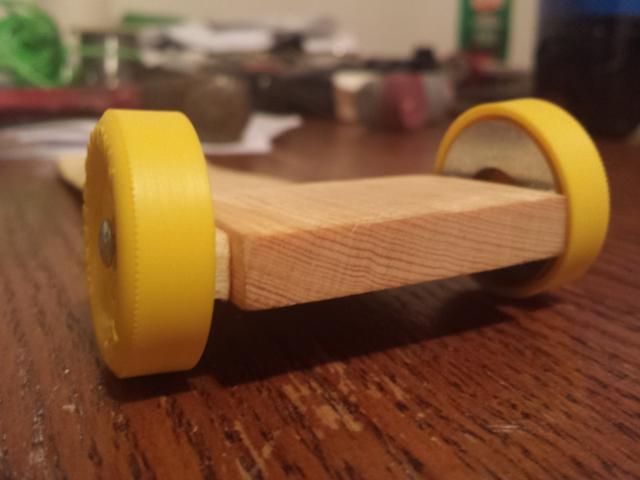
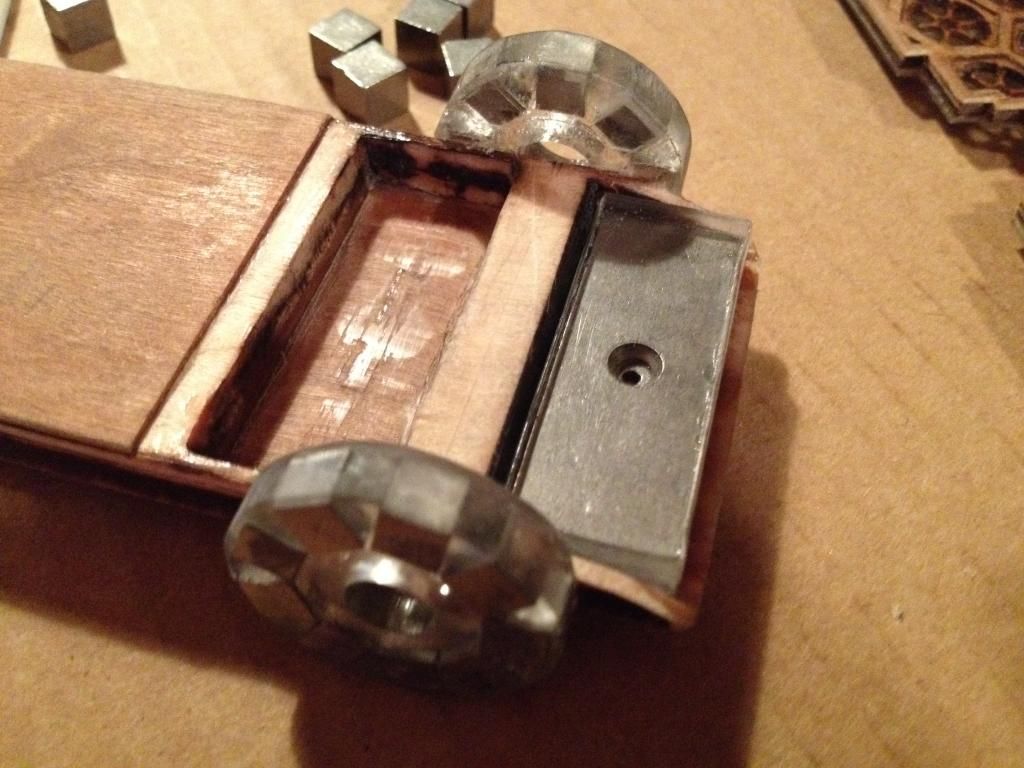
here is 1/2 a side done and pictures and a bit of a walk thru information process.
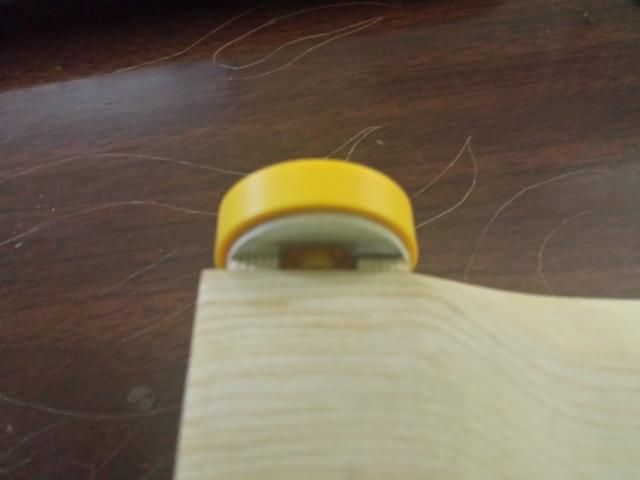
BTW- My cant here, if I got a good enough picture. well it's more than 2.5 degrees.
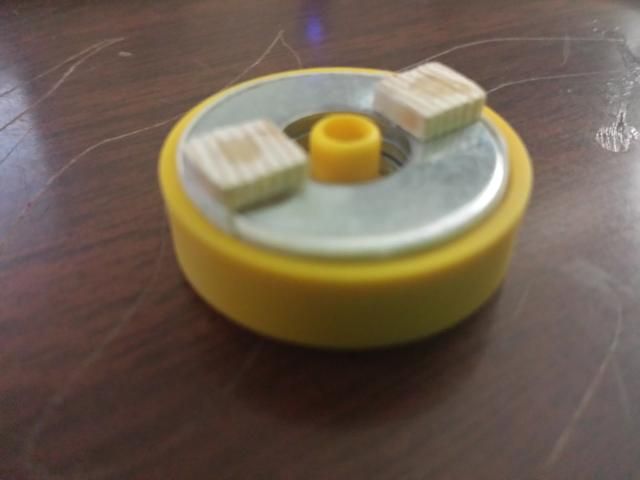
The wood spacers I did quickly, are 3/16th thick. 3/8th wide and 4/8ths long. I am sharing this. but this is just ruff first tinker.
I just used gel super glue, to hold the wood on. to hold the washers together and to the wood.
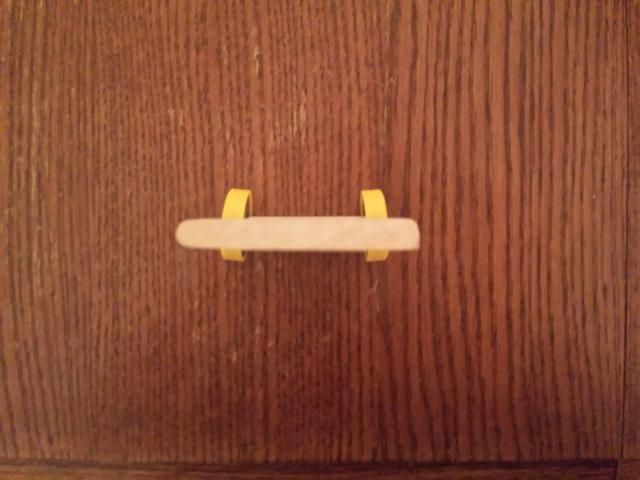
I wanted to make sure I got the washers on inside the wheel and mounted to the body, and not have a rub issue. So I cut a few strips of masking tape and rolled it / wrapped it around the outside of the washers edge. 3 wraps I did.
I needed to just sit a 3rd washer inside of the wheel, to get spacing right, when I went t install. I used axle/ axle head and pushed / put on the wheel, gel glue was on the wood, and pushed on and to get glue to dry, and hope be center. it worked out nicely.
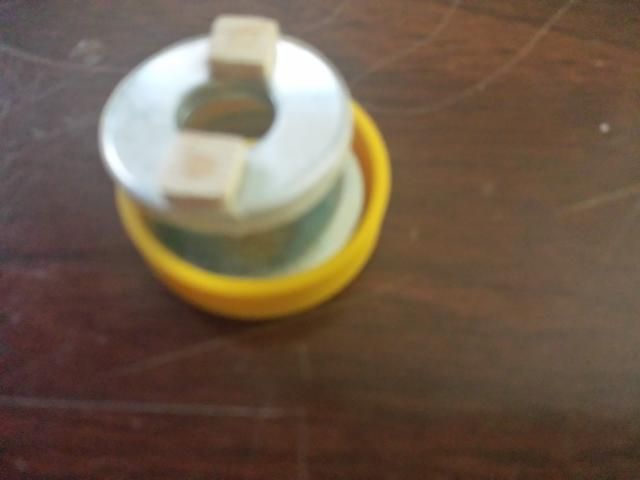
what it looks like, with the 3rd loose washer just in there.
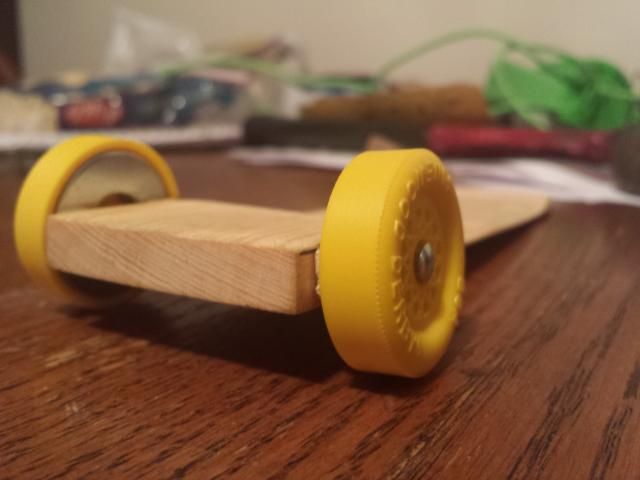
I then when dry, pulled my axle back out and removed the loose 3rd washer and removed the masking tape wrapped around the washers edge and put wheel and axle back on to see if it pun and worked.
--
video clip, click on to play. (ruff clip)
showing it spins and no bind, axle was not all the way in, not lubed or prepped or any of that, just tinker, test time.

I had a hard time getting a close up with focus, I know it looks crooked or not true, but trust me, its pretty true. meaning the, toe in and toe out.
-
That's all I got for now. I did not even expect to tinker today. So any hoot.
added in-
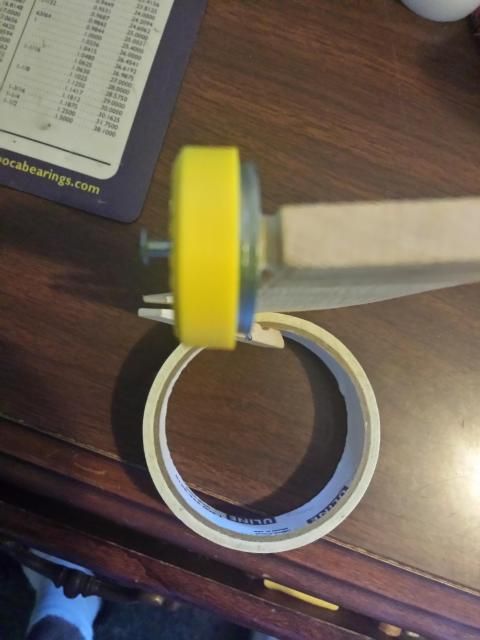
a slightly better short video clip of the wheel spinning, I pushed the axle farther in too. hard to shoot and spin. so sorry for blurriness at times.
video clip of spin and not touching. no lube, no prep.
click/double click to play.

Sporty
Been tinkering a bit, I got one side done, test/tinker.
I find the o.d. to work just fine. I do feel ya, the I.D. is a bit big. but what I could find at the store.
I had a 3/4 of a way done car, just sitting, never finished it, just needed weight and tuning. and paint or monokote. So decided to tinker.
here is 1/2 a side done and pictures and a bit of a walk thru information process.
BTW- My cant here, if I got a good enough picture. well it's more than 2.5 degrees.
The wood spacers I did quickly, are 3/16th thick. 3/8th wide and 4/8ths long. I am sharing this. but this is just ruff first tinker.
I just used gel super glue, to hold the wood on. to hold the washers together and to the wood.


I wanted to make sure I got the washers on inside the wheel and mounted to the body, and not have a rub issue. So I cut a few strips of masking tape and rolled it / wrapped it around the outside of the washers edge. 3 wraps I did.


I needed to just sit a 3rd washer inside of the wheel, to get spacing right, when I went t install. I used axle/ axle head and pushed / put on the wheel, gel glue was on the wood, and pushed on and to get glue to dry, and hope be center. it worked out nicely.

what it looks like, with the 3rd loose washer just in there.

I then when dry, pulled my axle back out and removed the loose 3rd washer and removed the masking tape wrapped around the washers edge and put wheel and axle back on to see if it pun and worked.
--
video clip, click on to play. (ruff clip)
showing it spins and no bind, axle was not all the way in, not lubed or prepped or any of that, just tinker, test time.
I had a hard time getting a close up with focus, I know it looks crooked or not true, but trust me, its pretty true. meaning the, toe in and toe out.

-

That's all I got for now. I did not even expect to tinker today. So any hoot.
added in-
a slightly better short video clip of the wheel spinning, I pushed the axle farther in too. hard to shoot and spin. so sorry for blurriness at times.
video clip of spin and not touching. no lube, no prep.
click/double click to play.
Sporty
Re: weight, anyone doing the new placement ?
K a tad bit more info for people and hopefully someone else can start posting and sharing. lol.
weight, well washers. like I said id like to make some lead ones or buy the puma weights to try.
2 washer- the weight can very.
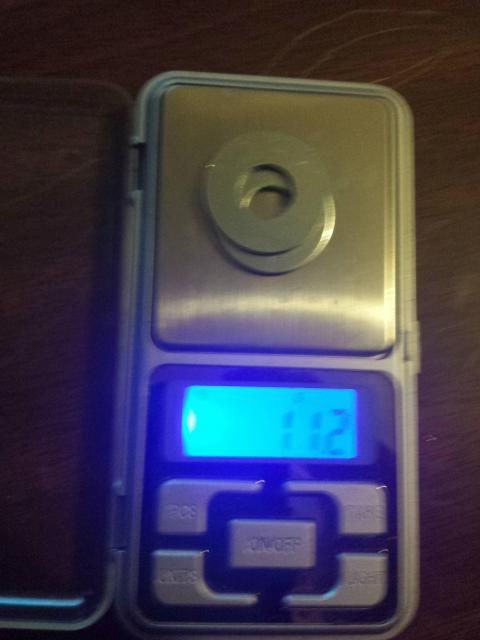
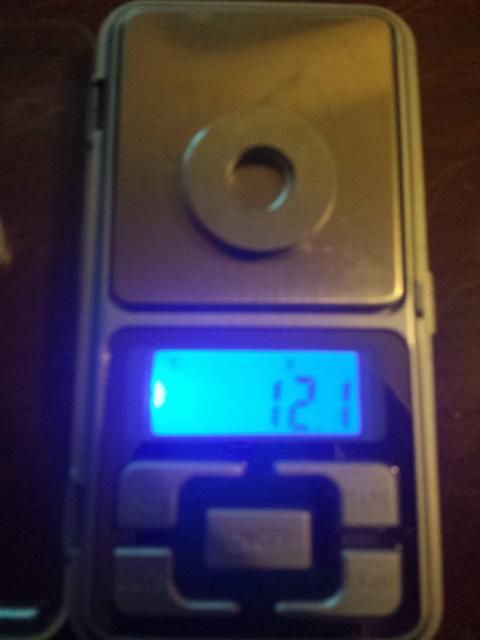
So if you are going to use washers, might want to make sure you get the ones that weigh the same or close to it.
4- washers-
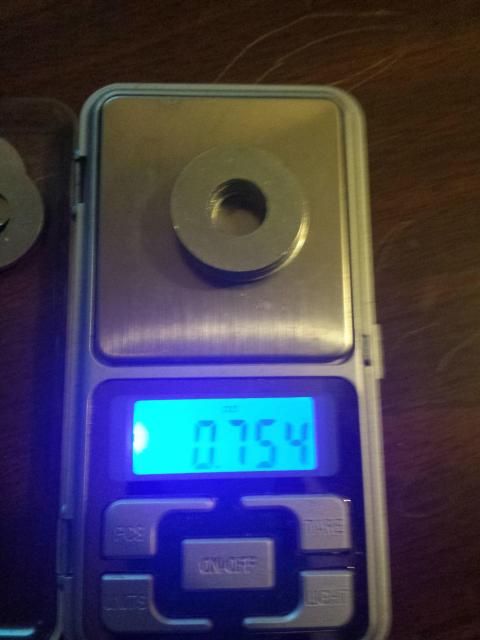
about 3/4 of a oz.or around 22 grams. its going to very overall, depending on if you buy your own washers and pick thru them.
Naturally the tungsten or lead will be much heavier.
Sporty
Re: weight, anyone doing the new placement ?
I know people have used foam in the past, to dampen the sound, aero and absorb micro vibration. Not sure many are doing that anymore either ???
just something to think about, in the tinker/ test stages of all this.
thought I better do the other side and get it together and add in a few more pictures. Again this is tinker stage and not going to ever race or run, just a 1st assemble, tinker.
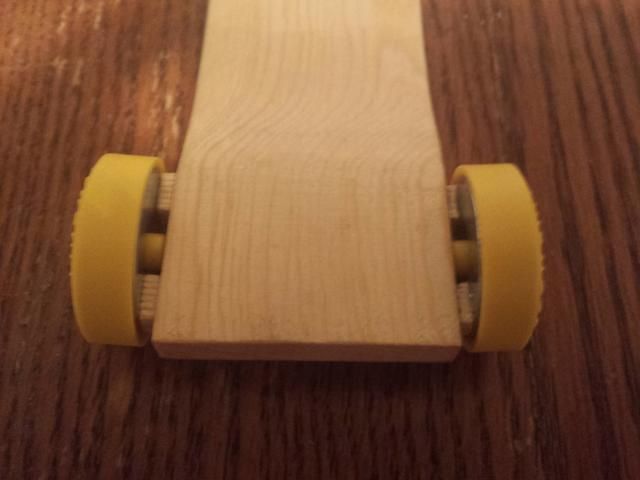
Again, Hope some others doing this can chime in, with and without, time differences, overall improvement, ect, ect.
And sure be nice to know, if my first tinker here, if there is flaws or issue's that people already building and running this can point out or share.
And further more, still like to see with the tungsten ones and with lead. and oh my, the weight placement elsewhere to finish it off. and new shapes or variations with out all the weight needed. lower thinner, skinner rear fin !
Sporty
just something to think about, in the tinker/ test stages of all this.
thought I better do the other side and get it together and add in a few more pictures. Again this is tinker stage and not going to ever race or run, just a 1st assemble, tinker.


Again, Hope some others doing this can chime in, with and without, time differences, overall improvement, ect, ect.
And sure be nice to know, if my first tinker here, if there is flaws or issue's that people already building and running this can point out or share.
And further more, still like to see with the tungsten ones and with lead. and oh my, the weight placement elsewhere to finish it off. and new shapes or variations with out all the weight needed. lower thinner, skinner rear fin !
Sporty

Re: weight, anyone doing the new placement ?
Hi Sporty and Stan!
Hi Whoda!
I am so happy that you like the ideas behind the Puma Wheel Weights and I would be happy to send you each a set!
Many thanks to a list of league racers/ organizers for doing extensive testing to see this theory validated.
Bravo to a league racer named Down4Derby that was developing/ testing similar ideas independently.
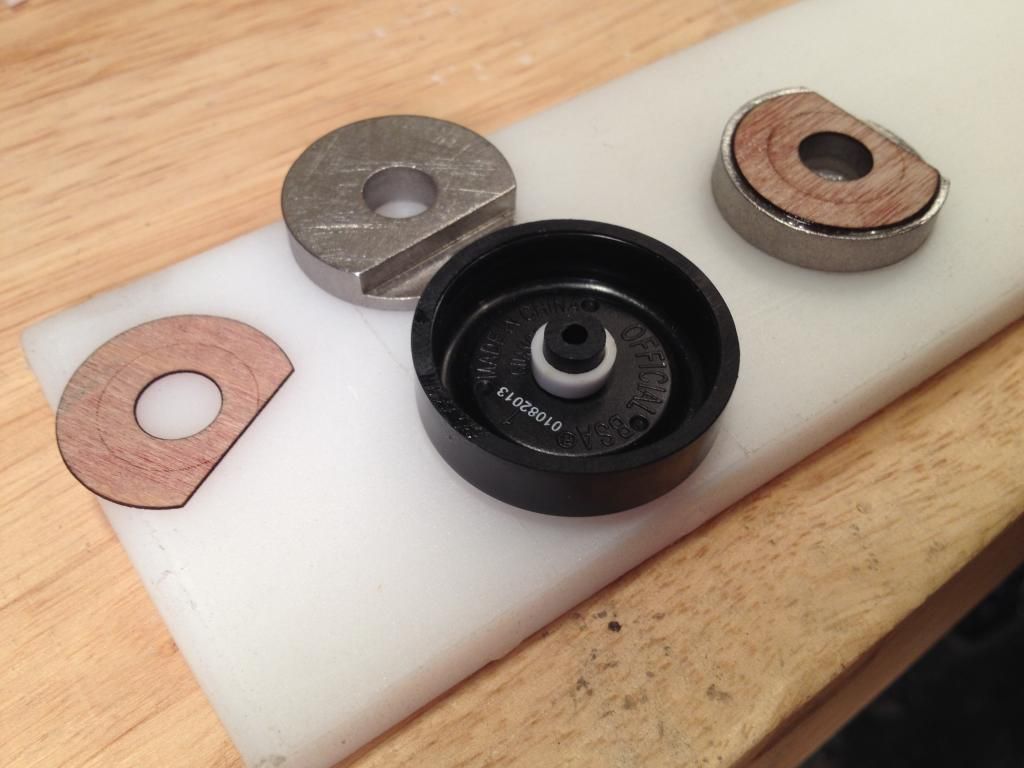
Here is a photo of the tungsten part.
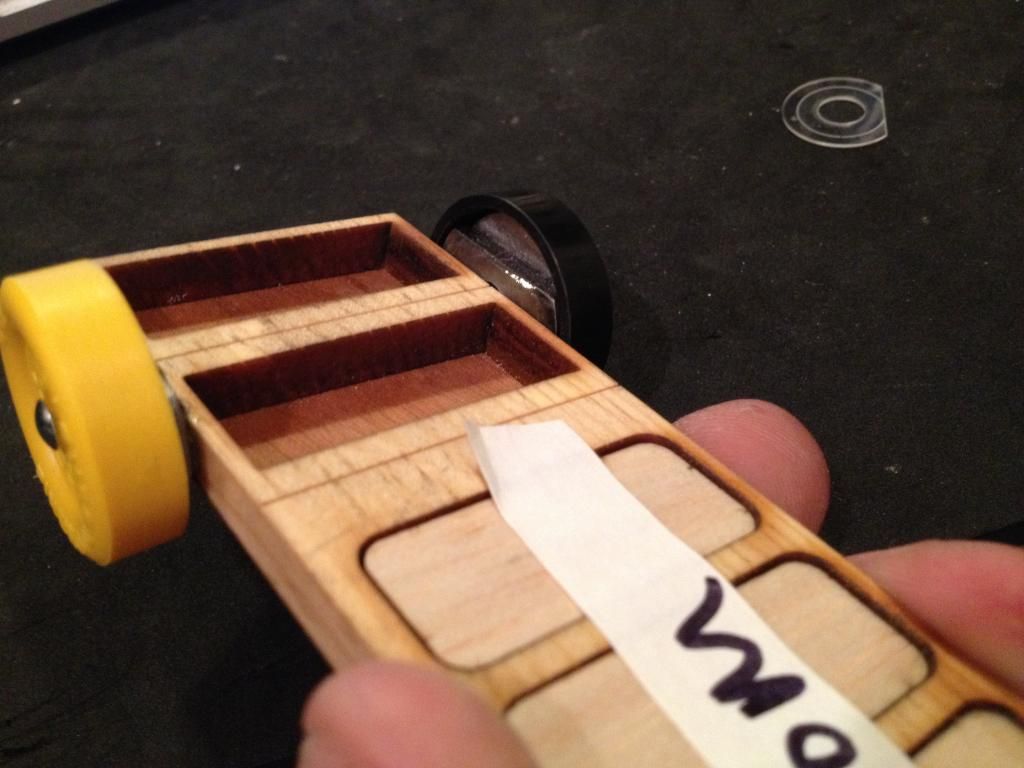
Here is a photo of the bottom of a car with the Puma Weights attached.
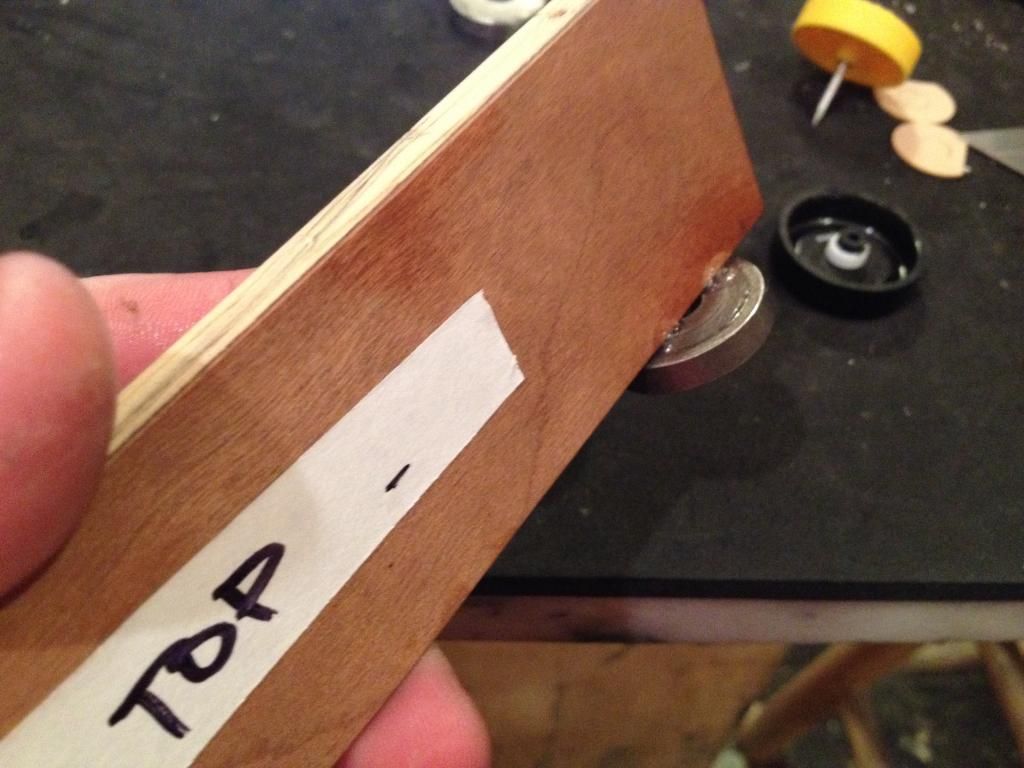
Here is a photo of the top of the car.
That system is looking like it has merit Sporty!
Here is one other photo of a wacky body design with the Puma Weights attached.
Thanks,
Joe Puma
Hi Whoda!
I am so happy that you like the ideas behind the Puma Wheel Weights and I would be happy to send you each a set!
Many thanks to a list of league racers/ organizers for doing extensive testing to see this theory validated.
Bravo to a league racer named Down4Derby that was developing/ testing similar ideas independently.
Here is a photo of the tungsten part.

Here is a photo of the bottom of a car with the Puma Weights attached.

Here is a photo of the top of the car.

That system is looking like it has merit Sporty!
Here is one other photo of a wacky body design with the Puma Weights attached.

Thanks,
Joe Puma
Re: weight, anyone doing the new placement ?
gpraceman wrote:I see an article idea for MaxV's newsletter. He does a good job of testing things out and reporting the results.
Those test cars are awesome!
Re: weight, anyone doing the new placement ?
Laserman , Joe puma.
Thank you so much for posting and sharing pictures.
Truly appreciate it.
Awesome.
What a very kind offer also. I'd love to have a set.
Can you please tell me what glue you use ? And I see a nylon washer. Do u need It ?
Thanks
Thank you so much for posting and sharing pictures.
Truly appreciate it.
Awesome.
What a very kind offer also. I'd love to have a set.
Can you please tell me what glue you use ? And I see a nylon washer. Do u need It ?
Thanks

Re: weight, anyone doing the new placement ?
So, I wonder...what about putting the weights in the rear fenders (assuming your car is running them)? Seems you'd get all the benefits of the in-wheel weights, except for the airflow thing, for which you could compensate with, perhaps, balsa inserts or something. I'm just way too paranoid to want anything so close to the rotating rears like that.
Re: weight, anyone doing the new placement ?
Hi Vitamin K,
I was nervous of the same thing when I started trying to fit some weight around the inner hub.
Here is a photo of some early prototypes of the weights.
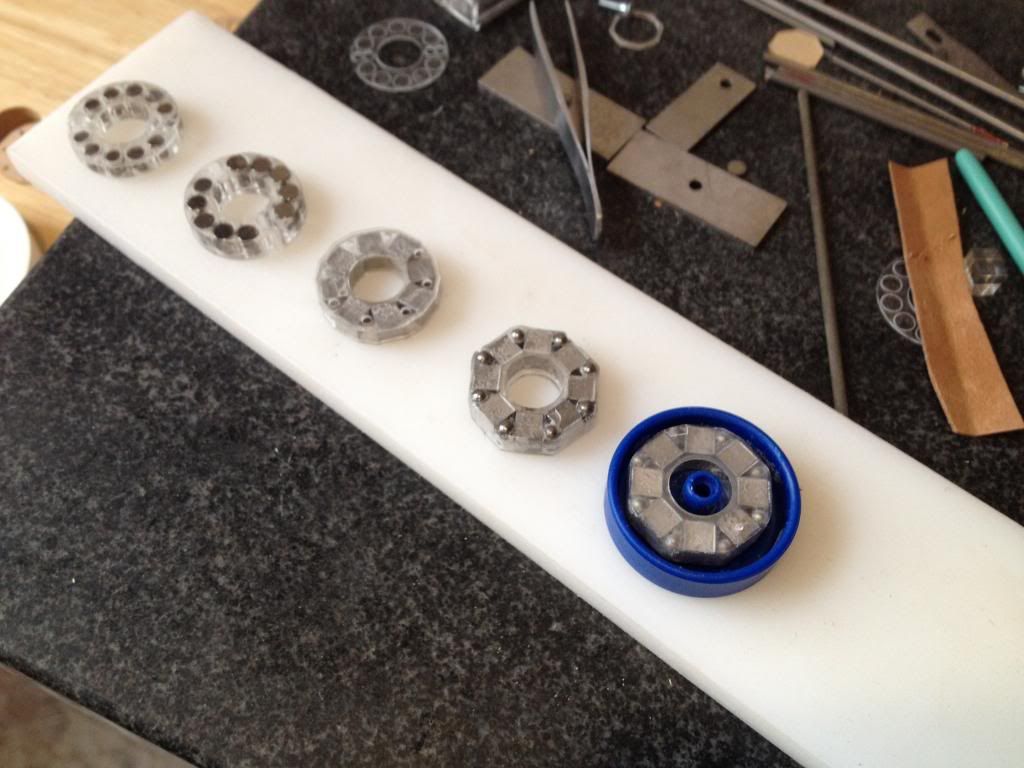
Eventually Down4Derby filled me in on a good system for centering the weight exactly around the inner hub.
The white washer in the earlier photos is a "centering jig" meant only for the purpose of locating the weight exactly within the wheel so that nothing will rub (after the weight is glued to the side of the car and the white washer is removed.
The white washer (centering jig) is not meant to be attached to the car at all.
It is only a tool that is disposable after install.
The way I attach the weights to the body is to put the centering jig in the wheel. Then I put the weight into the wheel so that the centering jig is inside the ID of the weight.
After that I put an axle thru the wheel, and insert the axle into the axle hole I have already drilled into the wood.
I use thick CA glue (Crazy Glue) to tack the Puma weight onto the car.
At this point the weight is somewhat fixed to the car so I can remove the wheel, axle, and the centering jig.
I do this so that no glue will get on my wheels/ axle/ centering jig and end up gluing those items to the car body.
Now I can get more CA glue onto the weight to really hold it firmly to the car.
I reinsert an axle into the axle hole (to prevent glue from going into the axle hole) and begin to put thin CA glue between the body and weight.
That is all there is to it.
Remove the axle after the glue has completely dried and put the wheel back on the car with your best axles.
The centering jig can be thrown out, or saved for your next install of Puma weights.
Here is a photo of a car with a set of prototype weights on it.
Shortly after this ca was built I figured out that with a set of the Puma weights coming in at 2.6oz there is no need for a weight pocket to be cut into the wood in front of the axle.
The remaining 1.4oz can easily fit behind the rear axles ,either with a weight pocket, or just cutting off the back of the car behind the axle and gluing weight in its place.
Thanks again!
Joe
I was nervous of the same thing when I started trying to fit some weight around the inner hub.
Here is a photo of some early prototypes of the weights.

Eventually Down4Derby filled me in on a good system for centering the weight exactly around the inner hub.
The white washer in the earlier photos is a "centering jig" meant only for the purpose of locating the weight exactly within the wheel so that nothing will rub (after the weight is glued to the side of the car and the white washer is removed.
The white washer (centering jig) is not meant to be attached to the car at all.
It is only a tool that is disposable after install.
The way I attach the weights to the body is to put the centering jig in the wheel. Then I put the weight into the wheel so that the centering jig is inside the ID of the weight.
After that I put an axle thru the wheel, and insert the axle into the axle hole I have already drilled into the wood.
I use thick CA glue (Crazy Glue) to tack the Puma weight onto the car.
At this point the weight is somewhat fixed to the car so I can remove the wheel, axle, and the centering jig.
I do this so that no glue will get on my wheels/ axle/ centering jig and end up gluing those items to the car body.
Now I can get more CA glue onto the weight to really hold it firmly to the car.
I reinsert an axle into the axle hole (to prevent glue from going into the axle hole) and begin to put thin CA glue between the body and weight.
That is all there is to it.
Remove the axle after the glue has completely dried and put the wheel back on the car with your best axles.
The centering jig can be thrown out, or saved for your next install of Puma weights.
Here is a photo of a car with a set of prototype weights on it.
Shortly after this ca was built I figured out that with a set of the Puma weights coming in at 2.6oz there is no need for a weight pocket to be cut into the wood in front of the axle.

The remaining 1.4oz can easily fit behind the rear axles ,either with a weight pocket, or just cutting off the back of the car behind the axle and gluing weight in its place.
Thanks again!
Joe
Last edited by Laserman on Fri Sep 19, 2014 2:18 pm, edited 1 time in total.
Re: weight, anyone doing the new placement ?
Thank you Joe !
For answering my guestions, showing your earlier prototypes
Joe, does laserman, also mean you got a laser and cut bodies ?.
For answering my guestions, showing your earlier prototypes
Joe, does laserman, also mean you got a laser and cut bodies ?.
